Observe apps running in Kubernetes (EKS)
Observe apps running in Kubernetes (EKS)
This guide will cover how to use the Elastic Stack to provide comprehensive monitoring of your EKS Kubernetes environment including:
- Container Logging
- Container Metrics
- Kubernetes posture management
- Kubernetes process and session monitoring
- EKS Audit Logging
- Kubernetes SIEM rules
To be able to tell the Elastic Agent what data to collect we will create a policy with the relevant Kubernetes integrations.
- In the left navigation menu, select “Fleet”.
- Select the “Agent policies” tab.
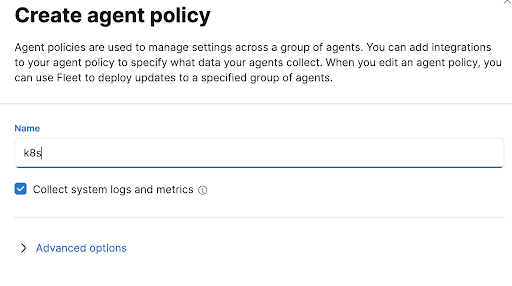
- Select “Create agent policy”.
- Call the policy something like “k8s” and leave the default to gather system logs and metrics.
Kubernetes Integration
Let’s start adding integrations to our new policy.
- Click the policy name.
- Click “Add integration”.
- In the search bar, let’s search for “kubernetes”. This should give us the “Kubernetes“ and “Kubernetes Security Posture Management” integrations.
- Let’s start with the Kubernetes integration.
- Click the integration and then “Add integration”.
- Leave all of the defaults as they are and click “Save and continue”. This will do two things: 1) it will add the assets for this integration and 2) also create an instance of this integration within your policy.
- It will then prompt you to add agents, but we want to add some extra integrations first so select “Add Elastic Agent later”.
Kubernetes Security Posture Management integration
Now let’s add the Kubernetes Security Posture Management integration. Click “Add integration” again, then find and click on the integration. You will see from the documentation that to be able to check the EKS cluster the integration will need an IAM user and it provides the required permissions.
In a new tab, go to your AWS Console, proceed to the IAM dashboard, and select “Policies” and “Create policy”. Select the “JSON” tab and paste the permissions from the documentation.
{
   "Version": "2012-10-17",
   "Statement": [
       {
           "Sid": "VisualEditor0",
           "Effect": "Allow",
           "Action": [
               "ecr:GetRegistryPolicy",
               "eks:ListTagsForResource",
               "elasticloadbalancing:DescribeTags",
               "ecr-public:DescribeRegistries",
               "ecr:DescribeRegistry",
               "elasticloadbalancing:DescribeLoadBalancerPolicyTypes",
               "ecr:ListImages",
               "ecr-public:GetRepositoryPolicy",
               "elasticloadbalancing:DescribeLoadBalancerAttributes",
               "elasticloadbalancing:DescribeLoadBalancers",
               "ecr-public:DescribeRepositories",
               "eks:DescribeNodegroup",
               "ecr:DescribeImages",
               "elasticloadbalancing:DescribeLoadBalancerPolicies",
               "ecr:DescribeRepositories",
               "eks:DescribeCluster",
               "eks:ListClusters",
               "elasticloadbalancing:DescribeInstanceHealth",
               "ecr:GetRepositoryPolicy"
           ],
           "Resource": "*"
       }

   ]
}
Select “Next:Tags”, then “Review”, give the policy a name of “elastic-kubernetes-posture”, and click “Create policy”. Now that we have a policy with the correct permissions, we can create the service account for the agent to access EKS. Go to “Users” and “Add users”. Let’s name it “elastic-kubernetes-posture-user” and select “Access key” as the credentials. In the permissions screen we can select “Attach existing policies directly” and find the policy we just created called “elastic-kubernetes-posture”. Then go through the “Tags” and “Review” screens before confirming with “Create user”. We now have our user. You should be immediately given access key credentials. Copy both the Access key ID and Secret access key. Now we can head back to Elastic.
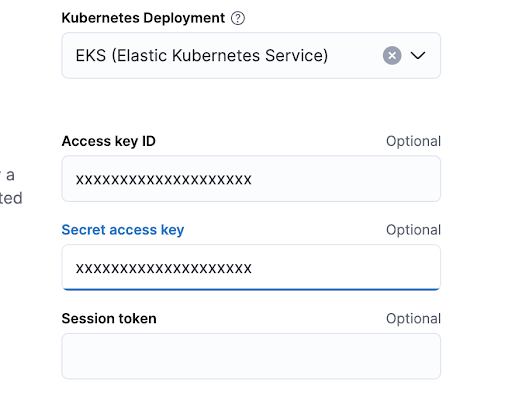
Back in the posture management integration, click “Add Kubernetes Security Posture Management”. In the configuration screen, in “Kubernetes deployment” select “Kubernetes Security Posture Management“. You can then add the credentials for the user we just created. Your screen should look like the image below with the correct credentials.
 Select “Save and continue”. Then again choose to deploy agents later.
Endpoint and Cloud Security
Back to your policy, let’s add one final integration. Back in “Add integration” select “Endpoint and Cloud Security” and then “Add Endpoint and Cloud Security”. Let’s call the integration “k8s-endpoint”. Click “save and continue” and, again, choose to deploy agents later.
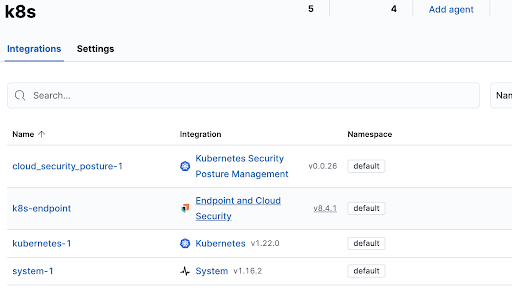
We now have 3 integrations in our policy so it should look like this.
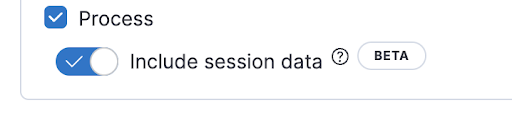
We would like to collect session information from Kubernetes hosts so let’s add that. Click on the name of the Endpoint integration we just created “k8s-endpoint” and you will be taken to the extensive configuration options. Scroll to the bottom and turn on “Include session data”.
Deploying Elastic Agent in EKS
To enable the Endpoint and Cloud Security integration to capture the required information, we can follow the steps outlined in the documentation here: Elastic Kubernetes Documentation
This provides an OOTB manifest to deploy Elastic Agent, with Endpoint added, as a Daemonset to our EKS cluster. Download this example manifest file here: Example manifest
-
Fill in the manifest’s
FLEET_URLfield with your Fleet server’s Host URL. To find it, go to Kibana → Management → Fleet → Settings.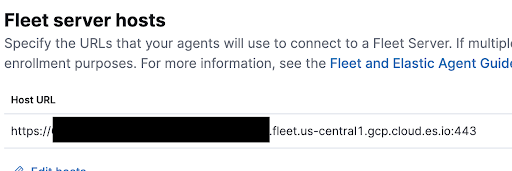
-
Fill in the manifest’s
FLEET_ENROLLMENT_TOKENfield with a Fleet enrollment token. To find one, go to Kibana → Management → Fleet → Enrollment tokens. Make sure to use or generate a token which is associated with the k8s policy.
We can now apply the updated manifest to our EKS cluster to deploy our Elastic Agent Daemonset (e.g. kubectl apply -f elastic-endpoint-security.yaml).
Everything that is within your Kubernetes cluster will now be monitored using Elastic.